The Windows – Antimalware Service Executable process is a crucial player within Windows Defender- a service that’s inbuilt for Windows 10 OS. (Please take note that it’s not related to the Emsisoft Anti-Malware!). On a low note, it’s a heavy consumer of both power and CPU usage, ending up in the prolonged performance of your computer.

As a fan of Windows Defender- you may have noticed spikes in CPU usage and normal processes taking way too longer than usual. Here’s great news! That has specific solutions.
It’s in the interest of every user to get adequate CPU usage and faster process executions. Here’s a resource to guide you through while getting the best from Antimalware Service Executable altogether.
Locate Background msmpeng.exe file
If you are running Windows Defender as your protection option, you are required to get to the task manager. Simply press – Ctrl + Shift + Esc or Start Menu. When the dialog box for the task manager is up, search for the list of background processes. Your target is to locate the process – Antimalware Service Executable, it has a support file named as – msmpeng.exe.
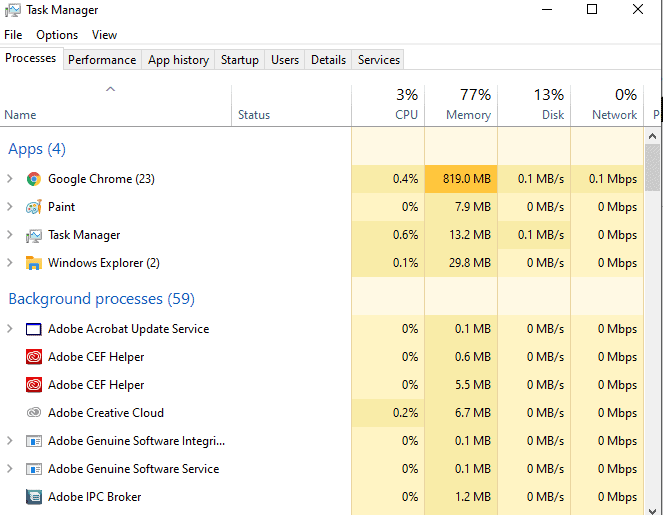
The file triggers processes that enable the Windows Defender to keep a continuous watch for threats, therefore saving you against the grievous effects of cyber hijackings and malware. Though justified, it can take up much of your CPU space and process- giving slow speeds and inefficiency with the computer.
On the same line of thoughts, the process- full scan can be another culprit for the same problem as msmpeng.exe. Full scan ruthlessly takes up CPU power and resources and may occasion pushing you to the limits with unusual delays and process disruptions.
Well, it’s typical for security software to take up computer resources, especially with active scanning procedures. Windows Defender seems to go overboard. The situation worsens when you are in a hurry- you want a quick boot to check on some emails and boom! Your PC is slower than ever when you require it to be faster.
Pro- Tip: The situation above can be more than frustrating. But the best advice is, not to deactivate Windows Defender, especially if you do not have any other security software installed. Windows defender may be the only last hurdle between your computer and the worst crooks hovering over the internet. At best, let windows defender take charge and resolve any queries raise- only then you can be on the safer side.
Following are Four Fixes to help when the Antimalware Service Executable takes up Heavy CPU Space:
1: Re-Schedule The Windows Defender’s Running Options
On most of the occasions, the significant memory usage arises when the Antimalware Service Executable coincides with Windows Defender is executing a full scan. Therefore, the remedy is to re-schedule the scanning and preferably shift it to timespans when the PC is not most occupied.
Steps To Optimize Full Scanning Schedules
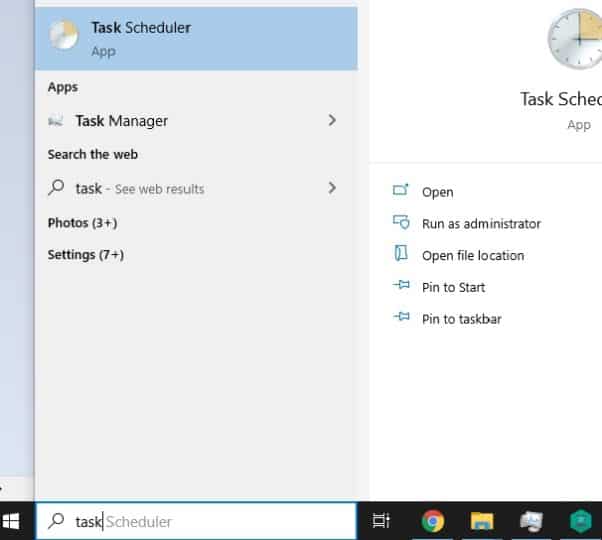
- Press your Windows key and from the Start menu, type in “task scheduler” and hit enter.
- Select the Task Scheduler Library by double-clicking on it. Your target is to expand the folders to the location: Library/Microsoft/Windows/Windows Defender.
- Double Click on the Windows Defender folder, and the middle pane, find the Windows Defender Scheduled Scan.
- Uncheck on all the options via clicking on the Conditions tab, and select Okay. That way, you can also schedule scans.
Keep in mind that you are required to protect your PC, therefore, ensure you schedule more scans, this time cleverly enough with less impact to your busiest schedules of computer usage. To achieve that, double click on the Windows Defender Scheduled Scans and choose the Triggers tab, then click New.
Create a new scanning schedule- preferable balancing up both your PC protection and efficiency. Utmost, allow the system to scan once a week on Friday afternoons, or when you feel minimal PC usage will be required.
To complete the scanning process, set up three more procedures with the same periods as the scan itself.
One is the Windows Defender Cache Maintenance, second is the Windows Defender Cleanup, and finally the Windows Defender Verification). All three are in the location/ folder: Library/Microsoft/Windows/Windows Defender.
2 Update Windows Defender’s exclusion list to Include Antimalware Service Executable
The fact is. When scanning, Windows Defender loops through every file (not forgetting itself). On occasions, unique interactions are the main cause of system lags. Therefore, to avoid it, program the Windows Defender to exclude itself while running the scans.
Here’s the Procedure for that:
- Open your Windows Task Manager by pressing on Ctrl Key + Shift + Esc.
- Lookup for the list of processes- and locate the Antimalware Service Executable. Right-click on it and from the options go for- Open File Location.
- Using the address bar, see the full path to the location of the Antimalware Service Executable. Simple, click on the address bar to automatically highlight the path and then select it.
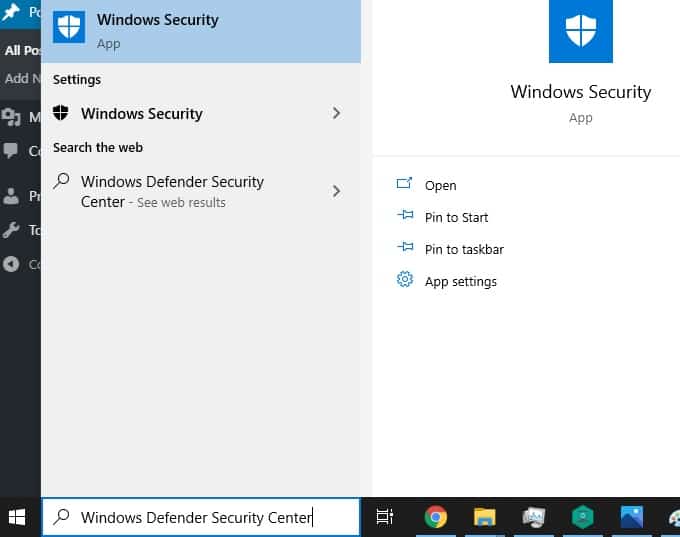
- Press the Windows button to trigger the Start menu. In it, key in “Windows Defender” and on the top of the options list, click Windows Defender Security Center to launch it.
- Choose the virus & threat protection option by clicking on it and go to the virus & threat protection settings.
- Scrolling downwards, you’ll find “Exclusions” and click on either Add or remove exclusions option. Next, on the pop-up screen, add exclusion by clicking on add. Proceed to the next screen, window and now paste the file path to the location of the MsMpEng.exe or the Antimalware Service Executable, via the windows address bar. Lastly, open the folder, and you’ll be able to locate it as one of the exclusions from the scans.
3: Disable/ Disable the Windows Defender
In any case, if the problem keeps plaguing you after the fixes one and two above, deactivating it Windows Defender may work. A heads up for this fix is that your PC is most vulnerable to Cyberattacks. The preferred way is to deactivate the Windows defender and ensure you have security software in place to cover the PC.
To deactivate the Windows Defender, you affect changes to the computer registry. Following is the procedure for launching and activating the edits to the registry:
- Press on the Windows Key + R key. That opens up the Run Dialog Box for you.
- Inside the Run Dialog Box, key in the text regedit and hit enter.
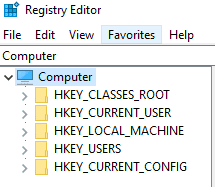
- Loot at the navigation pane located on the left Double click on the following location: HKEY_LOCAL_MACHINE\SOFTWARE\Policies\Microsoft\Windows Defender.
- Next, lookup for a registry entry DisableAntiSpyware, Once seen, double click on it and reset the value there to a 1.
Pro – Tips: In some instances, you may not see the entry – DisableAntiSpyware. Under such circumstances, you right-click the main Registry’s Editor pane and select the option for New > DWORD (32 bit) Value. Rename the same to DisableAntiSpyware and proceed to reset its value to 1.
4: Check the PC for Malware
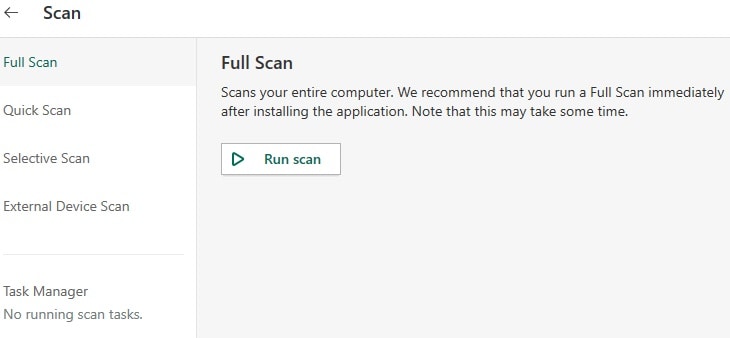
In case the Windows Defender severely impacts on the PC performance, something not usual may be to blame- malware. Therefore, go ahead and attempt a full scan with credible and light antimalware software. One good option is Emsisoft Anti-Malware. Pro-Tip:
Take advantage of the 30-day free trial version. It’ll help you scan and see if there’s malware causing the abnormal performance of your PC.
Take Away Note
Windows Defender is your first soldier when it comes to the security of Windows 10 OS PC. Remember it comes inbuilt. Take advantage of it. In case it gives you hitches by adversely affecting PC performance, be on the spot, armed with the above four fixes. Indeed, you should be lucky enough to find a perfect fix to the performance, like a pro. Over to you now.