Tinting your car windows is a popular customization that offers a multitude of benefits, including enhancing privacy, reducing glare and heat, and providing UV protection for the interior of your vehicle. With various levels of darkness and materials available, tinted windows can also add a sleek, finished appearance to your car.
While professional installation is always an option, some car owners may prefer to complete the tinting process themselves, making it essential to understand the basics of this task.
Before diving into window tinting, it is crucial to consider your local regulations and familiarize yourself with the different types of window tint materials.
Laws vary by state or country, ensuring that window visibility remains within safety limits. Additionally, selecting the appropriate tint material and darkness for your needs plays a significant role in achieving the desired outcomes.
Once you have gathered the necessary information, the process of tinting your car windows requires careful preparation, such as thoroughly cleaning the windows and working in a dust-free space. A well-executed window tint project results in improved comfort, privacy, and aesthetics for your vehicle, making the effort worthwhile.
Page Contents
- Types of Car Window Tints
- Preparation and Cleaning
- DIY Window Tinting Process
- Professional Window Tinting Services
- Maintaining Tinted Car Windows
- Benefits of Tinting Car Windows
- Legal Regulations and State Laws
- Determining Tint Level
- Tools and Materials for Window Tinting
- Costs and Savings
- Potential Consequences of Dark Tints
- Frequently Asked Questions
- What is the best method to apply window tint?
- How can I properly trim tint during installation?
- What tools are needed for a DIY window tint project?
- How long should I wait before rolling down windows after tint installation?
- What are the legal tint limits in my area?
- How do I remove bubbles from window tint?
Types of Car Window Tints
There are several types of car window tints available in the market, each offering unique features and benefits. In this section, we will discuss some of the most common types, such as tint film, ceramic tint, and metalized tint.
Tint Film
Tint film is a popular choice for car window tinting as it offers an affordable option to control the amount of visible light transference (VLT) in your vehicle. This plastic film is applied to your car’s windows, which helps to darken the glass and protect against harmful UV radiation. However, it is essential to choose a good quality tint film from a reputable manufacturer to ensure the best results.
Ceramic Tint
A more advanced type of window tint is the ceramic tint. It uses ceramic particles in the film to block UV radiation and infrared heat. Ceramic tints are notable for their excellent heat rejection capabilities, making them a top choice for those looking to keep their vehicle cooler during hot summer months. Furthermore, ceramic tints provide increased durability and do not interfere with GPS or cell phone signals.
Metalized Tint
Another option for car window tinting is the metalized tint, which contains small metallic particles to help block heat and UV rays. This type of tint is known for its superior heat rejection and glare reduction, providing a more comfortable driving experience. However, metalized tints may interfere with electronic devices like GPS and cell phone signals due to the metallic content in the film.
Laminate Film
In addition to the above tints, there is also laminate film, which is a multi-layered film that offers enhanced strength and protection. Laminate films are designed to keep the glass from shattering upon impact, providing an added layer of safety in the event of an accident.
When selecting a car window tint, it is important to consider factors such as your budget, vehicle usage, and local tinting regulations. By understanding the various types of tints available and their unique features, you can make an informed decision that best suits your needs and preferences.
Preparation and Cleaning
Before you can start tinting your car windows, it’s essential to clean them thoroughly. Cleaning the windows is a crucial step in the window tinting process, as even the smallest speck of dust or dirt may cause air bubbles and imperfections in the tinted film. A lint-free cleaning cloth and a high-quality glass cleaner are the two indispensable items for this step.
Begin by removing any dirt and grime from the exterior of the car windows. Use the glass cleaner and lint-free cleaning cloth in a circular motion to remove dirt and debris from the surface. If there is stubborn grime, dampen the cloth with a 50/50 vinegar and water solution. Allow the windows to air dry, or dry them with a clean cloth to avoid streaks or residue.
Next, you will need to clean the interior of your car windows. Since this is where the window tint film will be applied, the interior should be even cleaner than the exterior. Spray the glass cleaner generously on the window surface and wipe it with the lint-free cleaning cloth. For the best results, clean the windows in an up-and-down motion, followed by a side-to-side motion. This will ensure that you cover the entire surface, catching any remaining dirt or grime.
It is also necessary to ensure that the window edges are free from dirt and debris, as they will be in contact with the adhesive side of the tint film. Carefully clean the edges using a glass cleaner and lint-free cleaning cloth, ensuring there is no residue or dirt left on the glass surface.
Once your car windows are spotless, it is time to move on to the next step in the tinting process. Remember, a clean and lint-free surface is key to achieving a professional and flawless window tint.
DIY Window Tinting Process
To begin the DIY window tinting process, it’s crucial to gather the necessary tools and materials. You will need a window tinting kit, a squeegee, a utility knife, a heat gun, soapy water, and a microfiber cloth. Make sure to clean the windows thoroughly using soapy water and the microfiber cloth before starting the process to ensure maximum adhesion.
Start by measuring the windows and cutting the tint film according to the size of each window. The Family Handyman provides a great step-by-step guide on how to do this. Make sure to leave a slight excess of film when cutting to ensure full coverage.
Next, apply the tint film to the windows. Peel off the protective liner and spray the adhesive side of the film with soapy water. Position the film on the window, aligning it carefully with the edges of the glass. Use the squeegee to smooth out the film, removing any bubbles or wrinkles. Start from the center and work your way out to the edges, applying firm pressure to ensure even and smooth application.
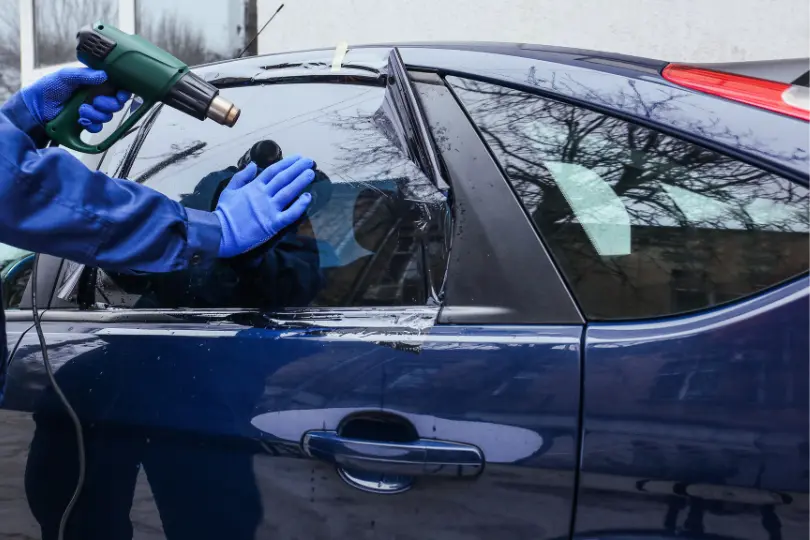
After the film is applied, you may need to use the heat gun to shrink and conform the tint to the curves of the window. Move the heat gun in a sweeping motion across the surface of the tint, making sure not to overheat or damage the film. This step is critical to achieve a professional-looking finish.
Lastly, use the utility knife to trim any excess film from the edges of the windows. Make clean, precise cuts for a seamless finish. Be cautious not to scratch the glass or damage the rubber seal around the window.
It’s essential to be patient and precise during the DIY window tinting process. With attention to detail and practice, you can achieve professional-looking results while saving money and customizing your vehicle to your preferences.
Professional Window Tinting Services
If you’re considering tinting your car windows, it may be worth looking into professional window tinting services. These experts bring a high level of skill and expertise to ensure a quality job that lasts for years.
One reason to choose a professional service is the quality of the installation. Professionals use high-quality materials and specialized tools to provide a seamless and long-lasting finish. In contrast, DIY tint jobs may result in bubbles, peeling, or uneven edges, leading to unsatisfactory results and frequent replacement.
Another advantage of hiring an expert is their knowledge of the legal regulations around car window tinting. Different states have varying rules regarding the allowable tint levels, and professionals will ensure your vehicle is compliant with these regulations, avoiding fines or other legal issues.
While professional window tinting can be more expensive than a DIY approach, the benefits often outweigh the cost. A high-quality tint job not only enhances the appearance of your car but also provides practical benefits such as heat reduction, UV protection, and increased privacy.
To find reputable car window tinting providers near you, explore websites like Yelp, where you can read reviews from previous customers and compare service providers in your area.
In summary, choosing a professional for your window tint installation is a wise investment in the long-term appearance, functionality, and value of your vehicle. Their skill, knowledge, and adherence to legal requirements ensure you receive a top-quality tint job that will last for years to come.
Maintaining Tinted Car Windows
Maintaining tinted car windows is essential to ensure they stay in good condition and continue to provide the desired benefits, such as reducing Visible Light Transference (VLT). Here are some tips to help you take care of your tinted windows.
Cleaning: When cleaning tinted car windows, it’s crucial to use an ammonia-free cleaner, as ammonia can eat away at the tint over time. Instead, opt for mild soaps or window cleaners specially formulated for tinted windows. Moreover, it’s recommended to use a soft cloth or a microfiber towel to avoid scratching the film.
Protecting: To protect your window tint film from damage, avoid using abrasive materials or substances that could scratch the surface. For instance, avoid using sharp tools or hard brushes when cleaning your car. Additionally, be mindful of objects with sharp edges that may come into contact with the windows, such as keys or jewelry.
Interior Surface: The interior surface of the window tint film is delicate and requires extra care. Avoid touching it with dirty hands, as dirt and oils can damage the film. Furthermore, when rolling your windows up or down, make sure there is no debris trapped in the window’s path, which could scratch the film.
Aftermarket Additions: If you’re planning to add any aftermarket products to your car, such as decals or window shades, be cautious about their compatibility with the window tint film. Some adhesives or materials could cause damage to the tint, so it’s best to consult an expert or read the product’s instructions to avoid any potential issues.
Thin Film: Keep in mind that window tint films are generally made up of a thin material, which can be damaged easily. As a result, it’s essential to be cautious during activities such as cleaning or applying aftermarket additions. Being mindful of the film’s fragility will help you maintain its appearance and functionality.
By following these guidelines, you can make sure your tinted car windows remain in optimal condition for a longer time, allowing you to enjoy their benefits without any hassle. Remember to manage your windows with care and provide routine maintenance to keep them looking and functioning their best.
Benefits of Tinting Car Windows
Tinting your car windows offers multiple advantages to drivers and passengers alike. One of the most noticeable benefits is the increase in privacy that tinted windows provide. The reduction in visibility from the outside helps to create a more secluded environment inside the vehicle.
Another significant advantage of car window tinting is the reduction in UV radiation. A high-quality tint can block up to 99 percent of harmful ultraviolet rays, protecting passengers from potential skin damage and health risks associated with prolonged sunlight exposure. This feature also helps reduce the fading of interior surfaces such as upholstery and dashboard components, thereby maintaining the vehicle’s appearance and value over time source.
In addition, tinted windows can reduce glare from sunlight and headlights, improving the overall visibility and driving experience. This attribute is especially useful for those who are sensitive to bright lights or drive frequently in sunny or high-glare conditions.
A less obvious yet essential benefit of window tinting is the improvement in safety and security. The film’s adhesive properties can hold the glass together in the event of an accident or attempted break-in, preventing shards from shattering and causing injury. This added layer of protection can offer peace of mind to drivers and passengers alike.
Lastly, tinted windows provide better temperature control inside the vehicle by reducing heat transmission. The film filters out up to 90 percent of the sun’s infrared radiation, allowing the air conditioner to operate more efficiently, saving fuel and providing a cooler, more comfortable environment for passengers. source.
Legal Regulations and State Laws
When it comes to tinting car windows, it’s essential to be aware of the legal regulations and state laws that govern this practice. Different states have their own specific rules, so it’s crucial to familiarize yourself with the regulations in your location.
In California, for example, the Visible Light Transmission (VLT) percentage for the front side windows should be at least 70% (allowing 70% of light to pass through). The back side and rear windows, on the other hand, can have any level of darkness as long as the vehicle is equipped with side mirrors on both sides. Violating these rules may result in a citation and a fine.
Visibility is an essential aspect of window tinting regulations. Ensuring that drivers have a clear view of the road, vehicles, and pedestrians around them is crucial for safety reasons. In many states, windshield tints must allow a minimum VLT percentage to maintain adequate visibility.
Apart from state laws, local laws may also exist, depending on which city or county you reside in. Some municipalities may have stricter or more lenient rules than their state counterparts. It’s critical to research both state and local laws to avoid citations and remain compliant.
In some cases, a permit might be required to allow a higher degree of window tinting. These permits are usually granted for medical reasons, such as skin sensitivity to sunlight or glare-related vision issues. Obtaining a medical permit will usually involve providing documentation from a certified healthcare professional to prove the necessity of darker tinted windows.
It’s essential to stay informed about the legal regulations for window tinting in your area, as they can vary across the United States. Remember to always consult the relevant state laws and follow any local guidelines to ensure that your car’s tinted windows are safe, legal, and compliant.
Determining Tint Level
To determine the tint level of your car windows, it’s important to understand the concept of Visible Light Transmission (VLT). VLT is the percentage of visible light that passes through the glass and is used to rate the darkness of window tints.
A higher VLT percentage indicates that more light passes through, making the window tint lighter. Conversely, a lower VLT percentage means less light transmission, resulting in a darker tint. For example, a tint with a 5% VLT appears much darker than one with 50% VLT. Knowing the percentage of VLT of your desired tint is crucial for abiding by the legal regulations and for your own safety on the road.
Different shades of window tints also affect how the glass appears. Colors such as charcoal, bronze, and smoky gray offer unique aesthetic options, but the chosen color should not compromise the actual VLT percentage. It’s important to remember that the primary goal of tinting is to reduce glare, protect against harmful UV rays, and increase privacy.
Safety glass is another aspect to consider when choosing the right tint level. Factory-installed automotive glass typically integrates a clear layer of laminated safety glass, which acts as a bonding agent holding the window together in case of impact. This feature should not be compromised by excessively dark tints, as it can hinder the visibility of the driver and other road users.
In conclusion, to determine the appropriate tint level, keep the following factors in mind:
- Visible Light Transmission percentage: Consider the legal regulations in your area and always balance privacy with safety.
- Color: Select a tint color that compliments your vehicle’s appearance without undermining the actual VLT percentage.
- Safety glass: Ensure that the chosen tint level does not compromise the effectiveness of your vehicle’s safety glass.
Always consult with a professional installer to make an informed decision regarding the best tint level for your car, adhering to local regulations and ensuring the safety of all road users.
Tools and Materials for Window Tinting
To tint your car windows, you will need specific tools and materials. First and foremost, you need window tint film. Choose a high-quality film that suits your preferences and meets your local laws regarding tint percentage and reflectivity.
Next, gather the necessary tools for the process. Some essential tools include:
- Application squeegee: A must-have for smoothing out the film and removing bubbles during application.
- Heat gun or hairdryer: These will help you to heat-shrink the film and mold it to your window’s shape.
- Razor knife: This is crucial for trimming and cutting the tint film accurately.
- Spray bottle: Fill with a mild soap solution to lubricate the window and film during application.
Additionally, you may also want to have the following items on hand:
- Measuring tape: Ensures an accurate measurement of your window surface.
- Lint-free cloth: Useful for cleaning the window before applying the film.
- Straight edge: Assists in creating clean, precise cuts on the tint film.
- Felt-edged squeegee: The felt edge is gentler on the film and may help prevent scratches during installation.
Before starting the tinting process, you should take some time to clean and prep your car. A tidy, dust-free work environment will prevent imperfections during film installation, such as trapped dust particles, affecting the final result. Remember always to follow the instructions provided by the tint film manufacturer, as different films may have unique requirements.
Costs and Savings
Tinting car windows can be a worthwhile investment, offering a range of benefits for drivers. The cost of tinting car windows can vary depending on several factors, including the size and type of vehicle, the type of window film used, and the installation method chosen.
In general, the cost of window tinting ranges from around $100 to $400. Basic dye films are the least expensive option, while high-quality ceramic and metalized films are more expensive. However, it’s worth noting that investing in higher quality films can lead to more significant savings in the long run, as they offer better heat rejection and UV protection.
When considering window tinting, it’s essential to research and compare the prices offered by local dealers and installers. While some auto dealers may provide window tinting services, these options can be more expensive than working with specialized tint shops. By shopping around, you can find better deals and quality services at a lower price.
Window tinting can lead to savings in terms of fuel economy and vehicle wear. A quality window tint can reject up to 60% of solar heat, which can help to reduce the need for air conditioning usage. Less strain on the vehicle’s air conditioning system can result in improved fuel efficiency and reduced wear on the A/C system.
To ensure the legality of your window tint installation and avoid potential fines, make sure to adhere to your local laws and regulations. Some states have limitations on the tint’s percentage and required stickers to indicate compliance, which may slightly impact the overall costs of installation. These costs are usually nominal, but it’s essential to be aware of them and account for them in your budgeting process.
In summary, the initial cost of window tinting can vary based on several factors, but investing in a quality product and installation can lead to long-term savings. Make sure to research and compare local options to find the best deal that suits your budget and meets your aesthetic and functional preferences.
Potential Consequences of Dark Tints
Car owners often opt for window tinting to protect against UV radiation, keep the car cooler, and enhance privacy. However, dark tints can also have some negative consequences. In this section, we will discuss the potential risks associated with overly dark window tints.
Dark tints can significantly reduce the driver’s visibility, especially during nighttime or in low-light conditions. Limited visibility can pose a safety risk for the driver, passengers, and pedestrians. Furthermore, dark window tints can hinder the driver’s ability to gauge distances, leading to higher chances of accidents when maneuvering the vehicle.
UV radiation can be harmful to both the car’s interior and human skin. While darker window tints might seem to provide better protection against UV radiation, they may not necessarily be more effective. A well-manufactured car window tint with high-quality materials can provide sufficient protection against UV radiation without compromising visible light transference (VLT).
Another consequence of using overly dark window tints is the potential violation of local laws and regulations. Many states and countries have specific requirements for VLT in vehicle windows, and using dark tints beyond the allowed limits can result in fines or sanctions. Therefore, it is essential for car owners to research and obey the appropriate laws governing window tinting in their region.
Certain types of window tints contain metallic particles that can produce a reflective effect on the glass surface. In some cases, this reflection can interfere with the operation of electronic devices and systems inside the car, such as GPS systems and cell phone reception. Choosing a carbon-based tint without metallic particles can help avoid this issue, offering the benefits of dark window tints without the interference in electronics.
To sum up, it is crucial to consider the potential consequences of using dark window tints on your vehicle. Balancing the benefits of protection against UV radiation and heat with potential drawbacks like decreased visibility, legal restrictions, and interference with electronics is key to making an informed decision about the optimal tint level for your car’s windows. Dark tints have their benefits, but it is wise to remain aware of the potential risks associated with their use.
Frequently Asked Questions
What is the best method to apply window tint?
The best method to apply window tint is by using a professional installation. However, if you want to do it yourself, you can follow a step-by-step guide that entails cleaning your windows, preparing them for adhesive application, and carefully applying the tint using a squeegee to remove any air bubbles. This video can be helpful for learning the process.
How can I properly trim tint during installation?
Properly trimming tint during installation is crucial for a clean and professional appearance. Use a sharp utility knife and a straight edge (such as a ruler) to ensure accurate cutting. Measure your windows before cutting and always cut slightly larger than the actual window size to allow for adjustments during installation. For a more detailed guide, check out The Family Handyman’s guide to tinting car windows.
What tools are needed for a DIY window tint project?
A DIY window tint project requires some essential tools, including a utility knife, squeegee, lint-free cleaning cloth, window cleaning solution, application solution, and the window film itself. Some optional tools that may be helpful include a heat gun and a rubber scraper. When selecting window film, ensure that it is of good quality and from a reputable manufacturer.
How long should I wait before rolling down windows after tint installation?
After installing the window tint, it is recommended to wait at least 48 to 72 hours before rolling down your windows. This allows the adhesive time to properly set and cure. In some cases, it may take up to a week for the adhesive to fully cure and the film to achieve its final appearance. For more information regarding the curing process, refer to Car and Driver’s guide on window tinting.
What are the legal tint limits in my area?
Legal tint limits vary depending on your geographic location. Generally, laws regulate the Visible Light Transference (VLT) of the tint, which is the percentage of visible light allowed to pass through the glass. It’s crucial to research and adhere to your local laws to avoid fines or other legal complications. Websites like Kelley Blue Book’s car window tinting guide may provide information about legal tint limits in your area.
How do I remove bubbles from window tint?
Removing bubbles from window tint can be done by carefully using a squeegee to push the air out during installation. Ensure that your windows are clean and free from debris before applying the tint. When smoothing the film onto the window, work from the center outward in slow, deliberate strokes. If bubbles still form after installation, you can use a heat gun and a pin to gently release the air and smooth the film. Keep in mind that a professional installation can help minimize the risk of bubbles and other installation issues.